I still recall the excitement I felt when I first got my hands on the Ring Spotlight, eager to install it and enhance the security of my home. But oh boy, my excitement turned into confusion as soon as I saw my vinyl siding house. It seemed like a Rubik’s cube puzzle – no way this camera could hold on to the siding!
😨 Panic mode is on!
Thankfully, with the assistance of my neighbor, I discovered the perfect solution – special adapters designed specifically for vinyl siding. And guess what? We did it! With the adapters in place, the Ring Spotlight was firmly mounted on my vinyl siding, ready to catch any suspicious activity.
In this article, I’ll share how to a Ring stick-up and spotlight camera on your vinyl siding. So Let’s Dive In!

Perfect for Ring Stick Up & Spotlight Cam!
This Aobelieve Vinyl Siding Mount lets you install Ring cameras on houses with vinyl siding without the need of drilling holes and damaging the surface.
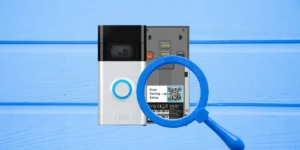
Unfortunately, the Vinyl Siding Mount might not be compatible with a fewer Ring Camera model. Below is a compatibility list for you to check before adding the mount to your cart:
| Ring Camera | Adapter Compatibility |
|---|---|
| Stick Up (Battery) | YES |
| Stick Up (Wired) | YES |
| Spotlight (Battery) | YES |
| Spotlight (Wired) | NO |
How to Install Ring Stick-Up Camera On Vinyl Siding
Things to Keep Ready
Step 1: Unbox the Ring Stick Up Camera
Start by opening the box that contains your Ring Stick Up Camera. Normally, you would attach the base (which comes with the box) to the camera unit, but since we’ll be mounting the camera unit to the vinyl siding in later phases, you must skip this step.
Step 2: Choose a Suitable Location
Decide on the location that suits you to mount your Stick Up Camera. I recommend looking for an area that provides a clear view of the area you want to monitor. Make sure there is an accessible vinyl siding seam nearby where you can attach the vinyl siding adapter.
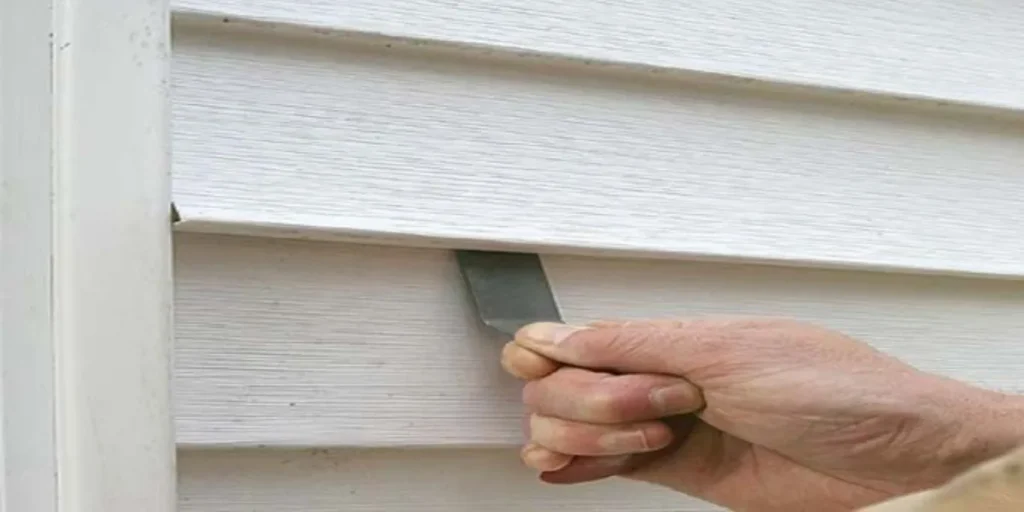
Step 3: Insert the Vinyl Siding Mount
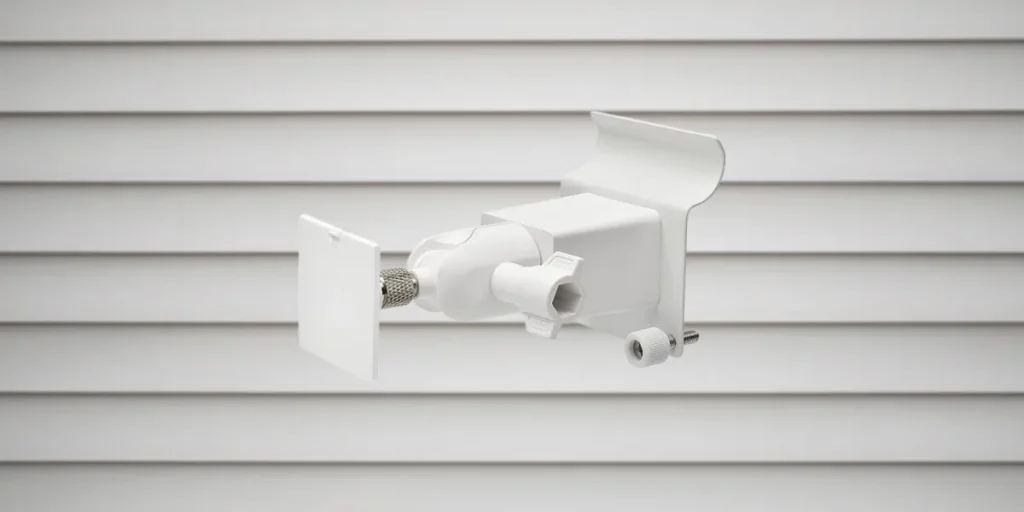
Take the vinyl siding mount and insert it into the seam of the vinyl siding where you want to mount the camera (slide the curved portion of the mount under.)
The adapter should easily clip into the seam without the need for drilling holes.
Step 4: Attach the Ring Stick Up Camera to the Mount
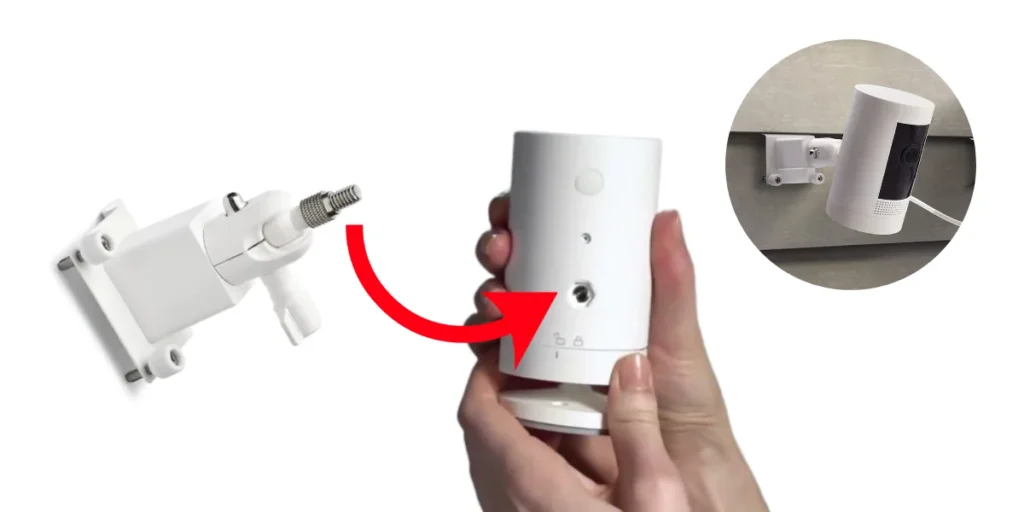
With the vinyl siding mount in place, now it’s time to attach the Ring Stick Up Camera to the mount. The stick-up cam comes with a mounting socket on its back. Insert the mounting socket of the camera into the siding mount’s bracket and rotate the camera until it securely locks into the mount.
Once attached, gently wiggle the camera to make sure it’s firmly locked in place.
That’s All! You’re done 😊
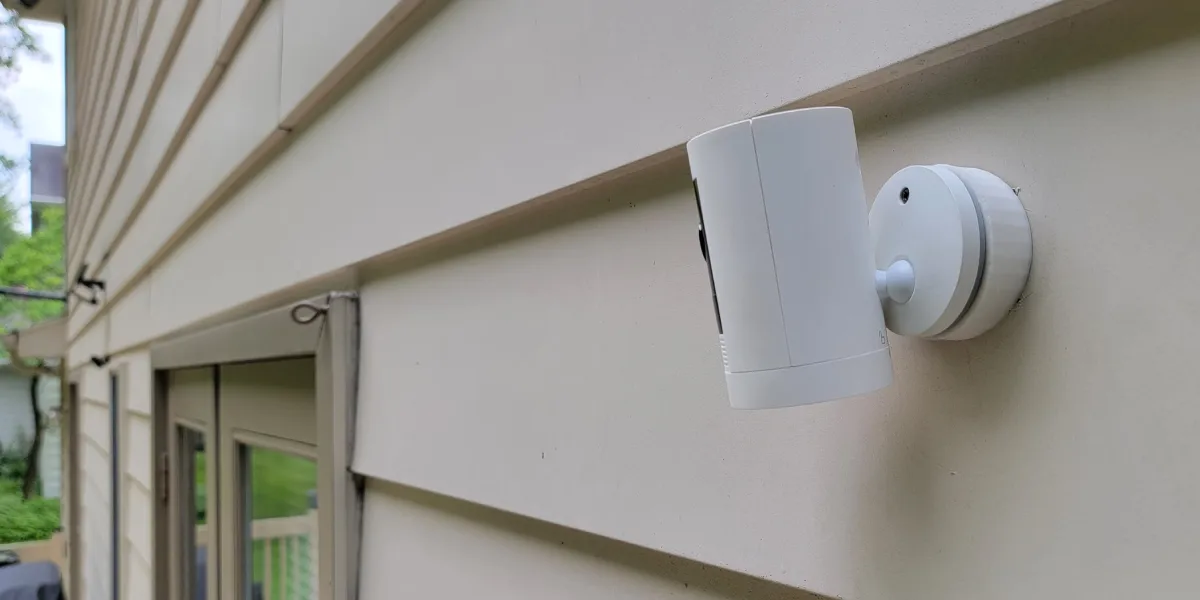
How to Install Ring Spotlight Camera On Vinyl Siding
Things to Keep Ready
Step 1: Unbox the Ring Spotlight Camera
Begin by unboxing your Ring Spotlight Camera and follow the manufacturer’s instructions to insert the battery into the camera unit. Once done, you can proceed to the next step.
Step 2: Choose a Suitable Location
Choose a suitable area to mount your Spotlight Cam. Finding a location with a clear view of the region you wish to watch is advised. Make sure there is a vinyl siding seam nearby where the vinyl siding adaptor may be attached.
Step 3: Insert the Vinyl Siding Mount
Take the vinyl siding mount and insert it into the seam of the vinyl siding where you want to mount the camera (slide the curved portion of the mount under.) The adapter should easily clip into the seam without the need for drilling holes.
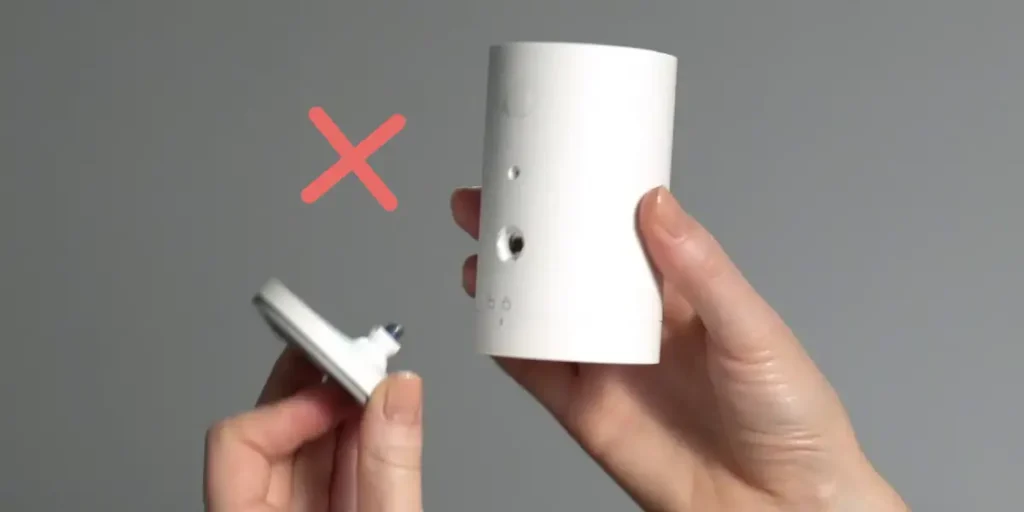
Step 4: Remove the Back Panel of the Spotlight Cam
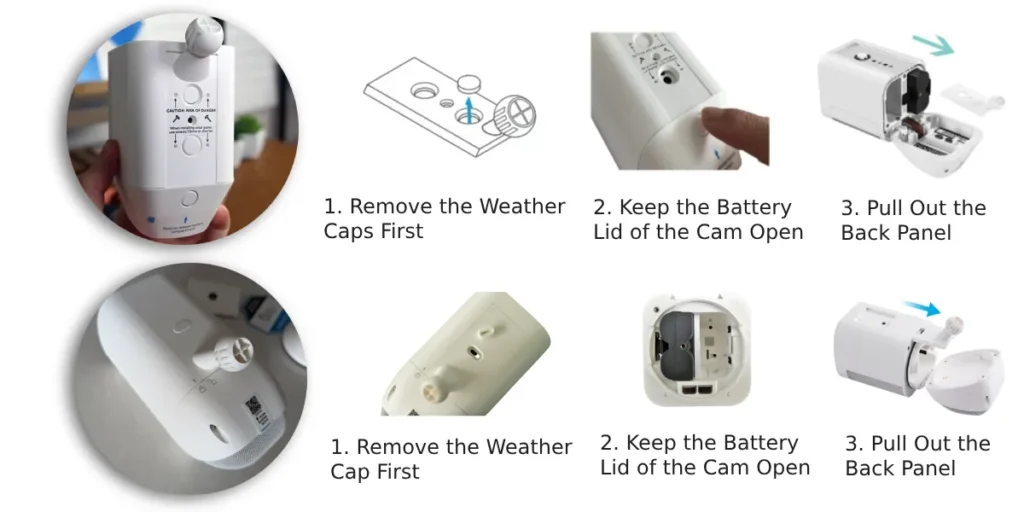
The process for removing the Spotlight Cam’s rear panel varies depending on the model. Because the back removal mechanism on previous versions was different from those on newer models.
To help you determine what kind of back panel removal mechanism your Ring Spotlight Cam has, I’ve attached some infographics above. Before moving on to the next step, remove the back panel from your Spotlight Cam by following the directions above (in the picture.)
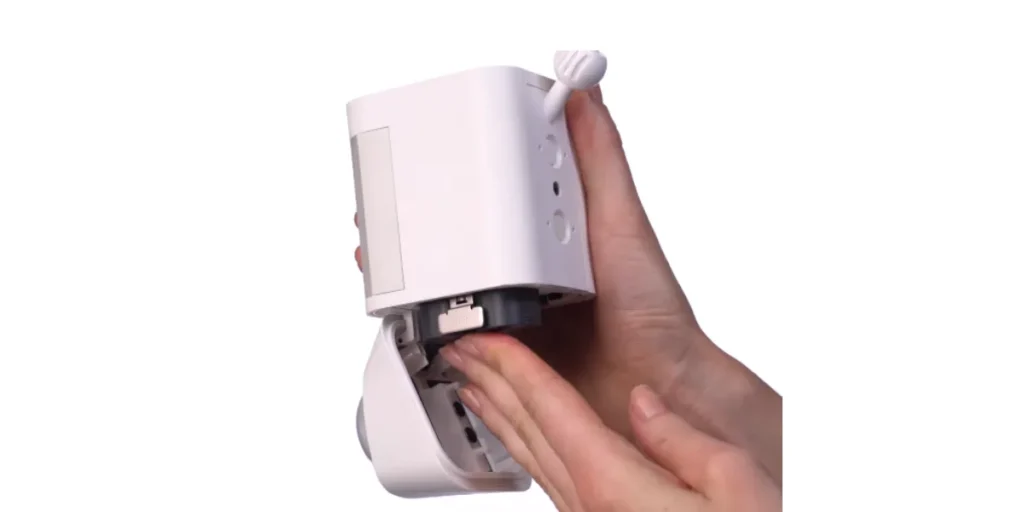
Step 5: Insert the New Back Panel
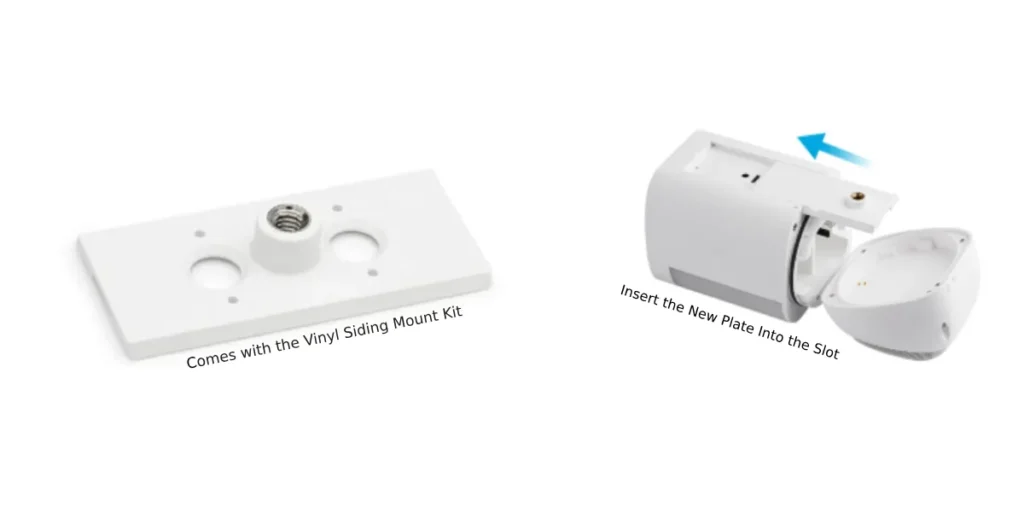
The Vinyl Siding Mount Kit comes with a back panel specially designed for Ring Spotlight Cam. To make your camera attachable to the vinyl siding mount, insert the new back panel into the empty slot.
The new back panel will enable the support for attaching the camera unit to the vinyl siding mount.
Step 6: Attach the Ring Spotlight Camera to the Mount

With the vinyl siding mount in place, now it’s time to attach the Ring Spotlight Camera to the mount. As now you have a mounting socket on its back, insert the mounting socket of the camera into the siding mount’s bracket and rotate the camera until it securely locks into the mount.
Once attached, gently wiggle the camera to make sure it’s firmly locked in place.
That’s All! You’re done 😊
Read More On Ring Camera